Applicable to Maptuner X (TX2A) and Maptuner Nano (NX3A and NB3A)
Locating ECU-connectors on Kawasaki watercraft
Note: In order to use diagnostic features you first need to Add Vehicle to Maptuner using the Programming ECU-cable. After this you can run diagnostic features with the Diagnotic-cable. View compatible cables here.
Step 1
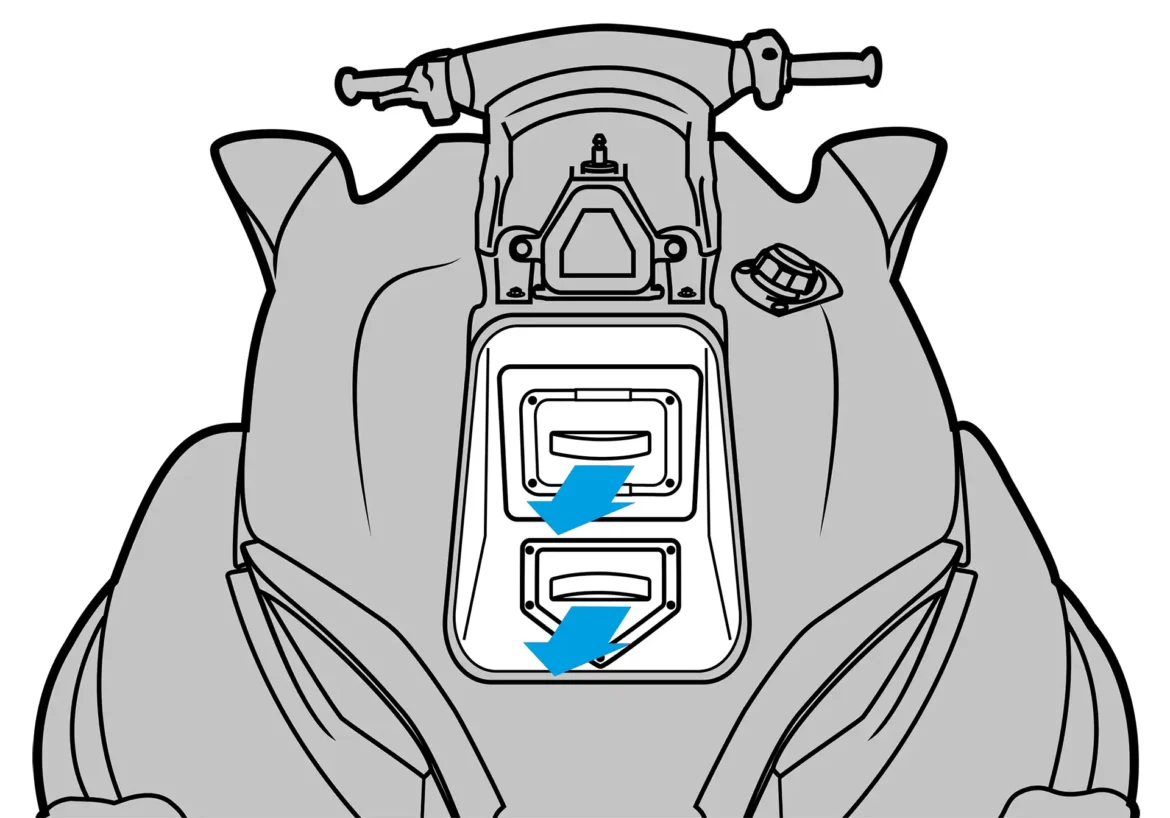
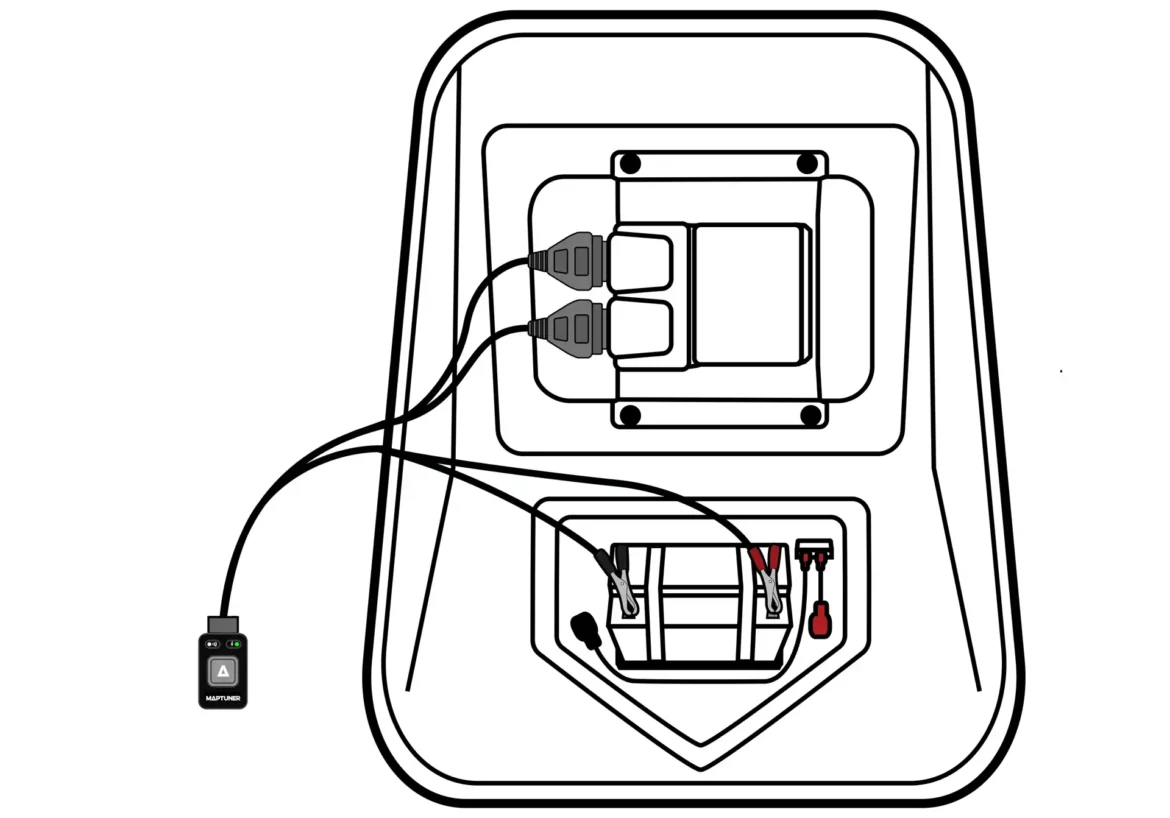
Open the front hatch of your watercraft and locate the electrical box & battery compartments.
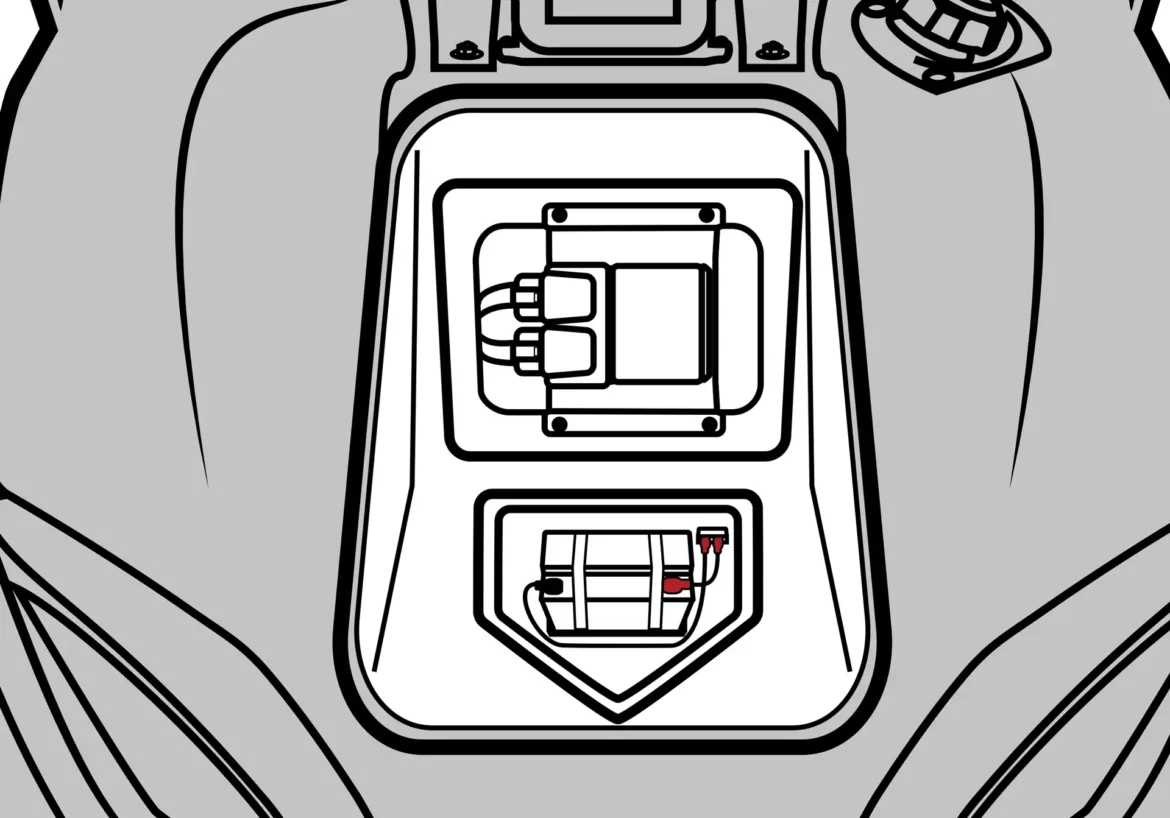
Remove both covers to access ECU & battery.
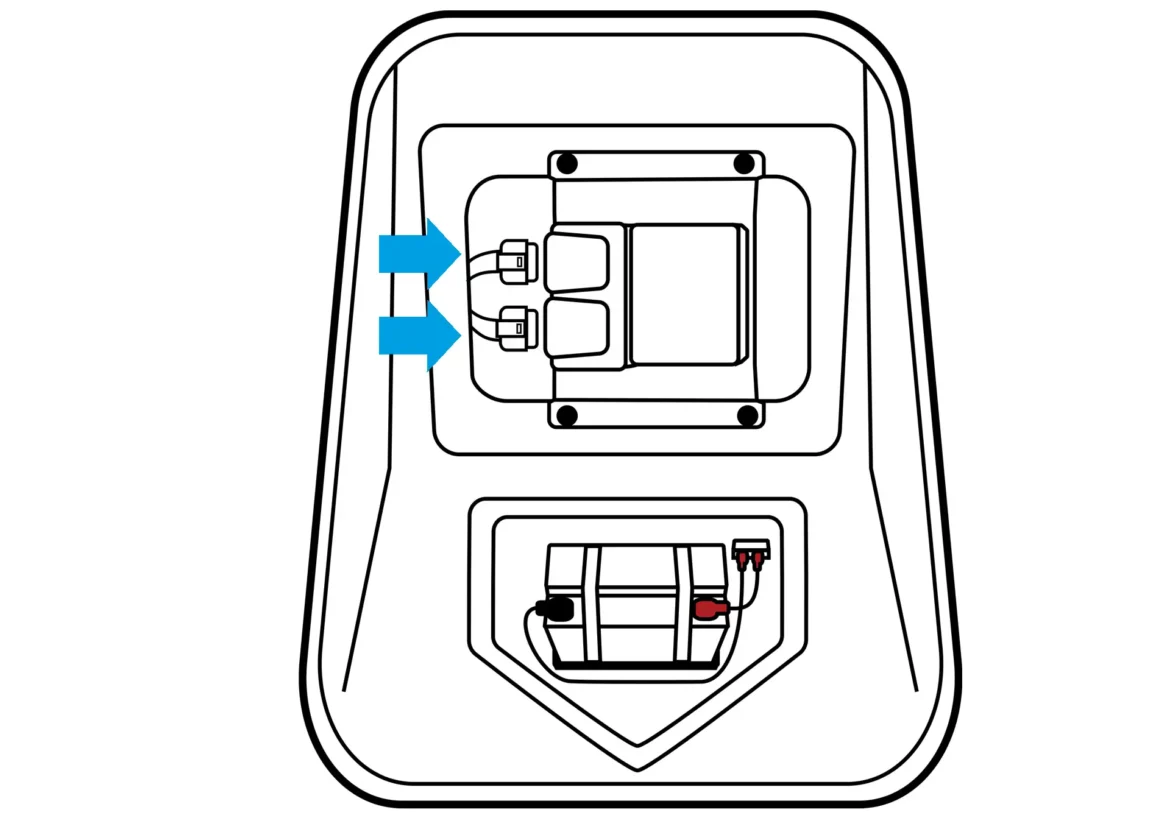
Step 2
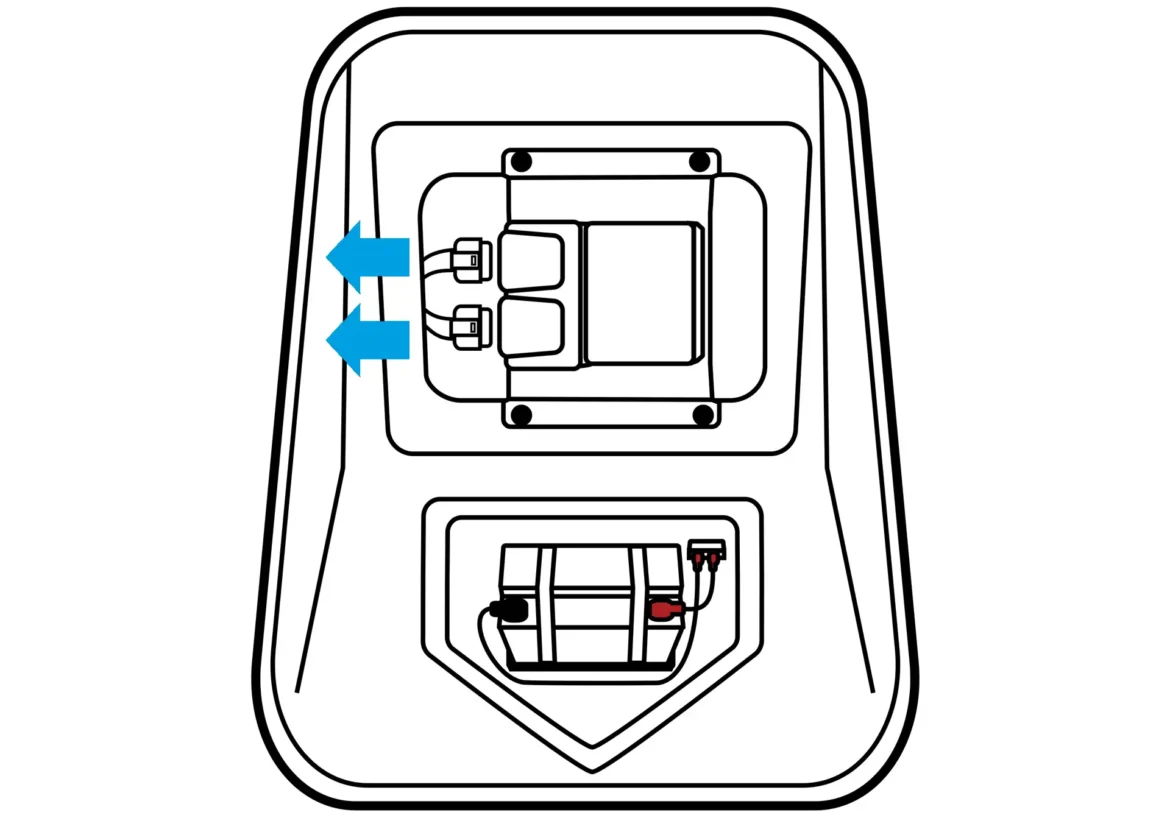
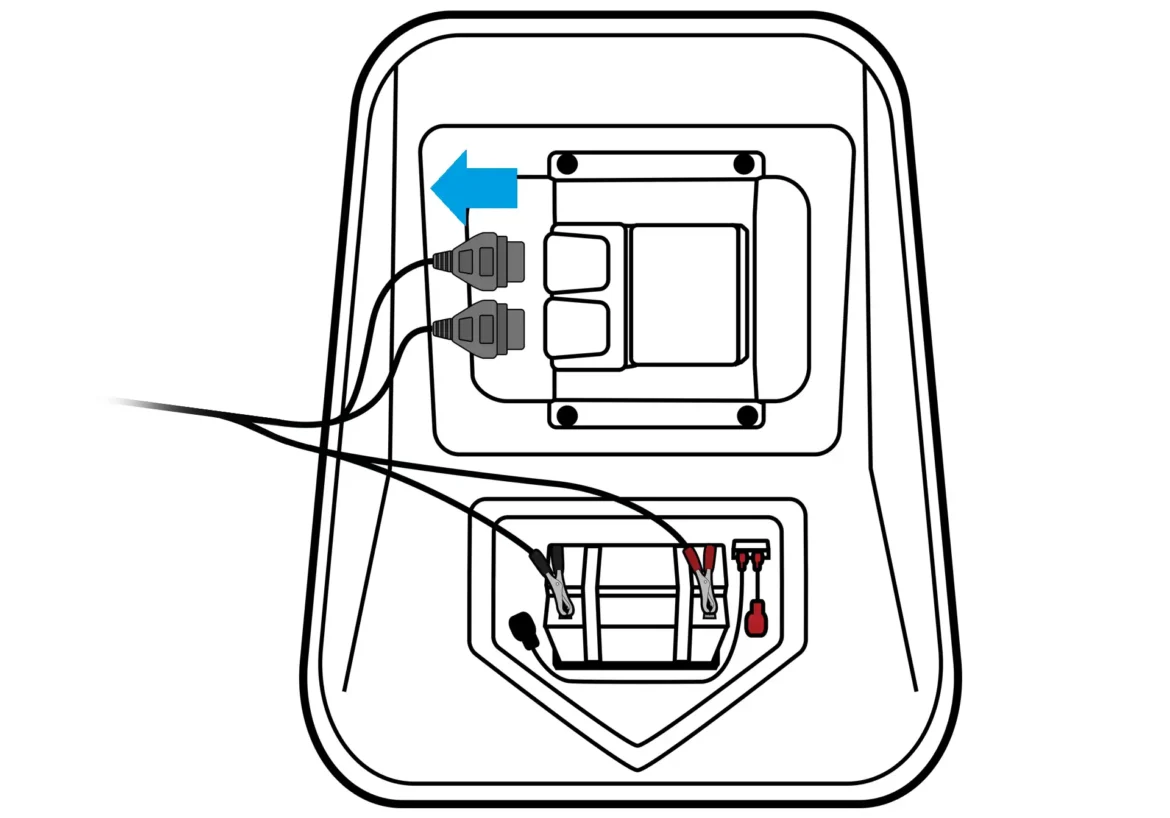
Unplug ALL original ECU connectors.
Step 3
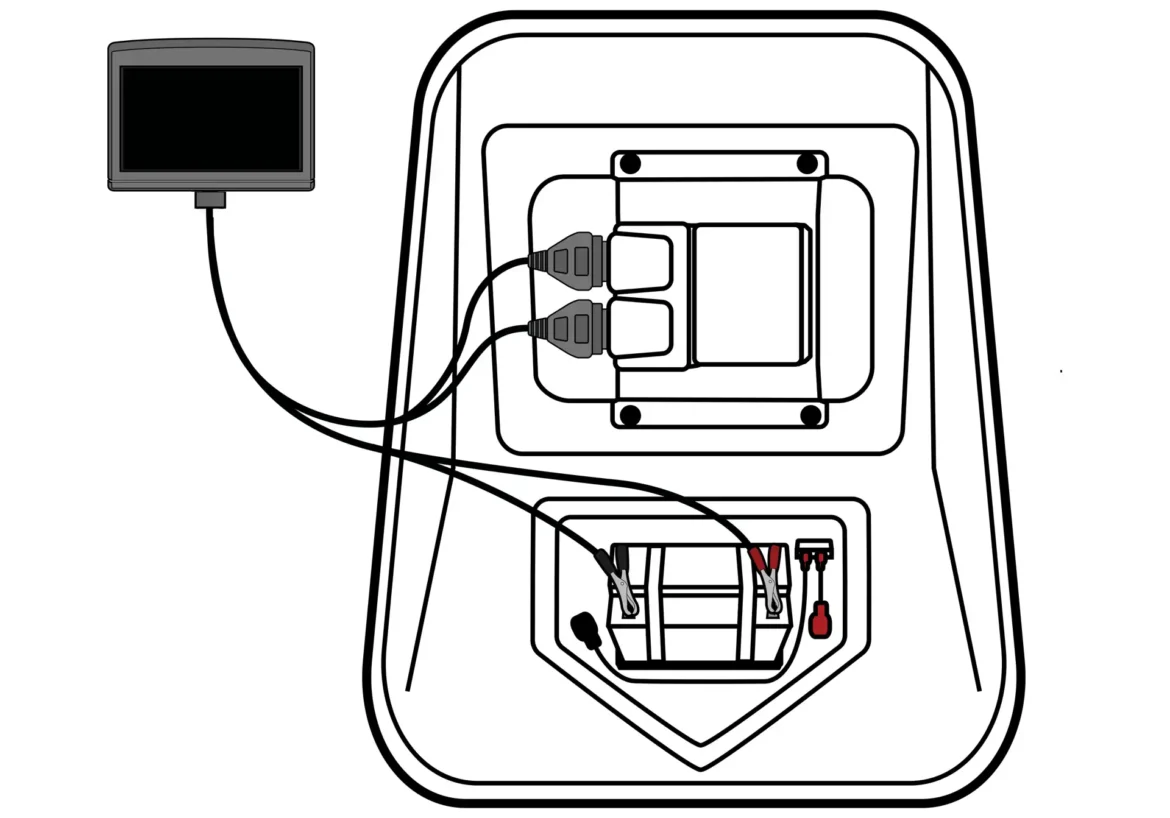
Plug the Maptuner into both ECU connectors. Illustrations show Maptuner X (TX2A) and Maptuner Nano (NX3A).
(See User Manual for your craft’s ECU location)
Step 4
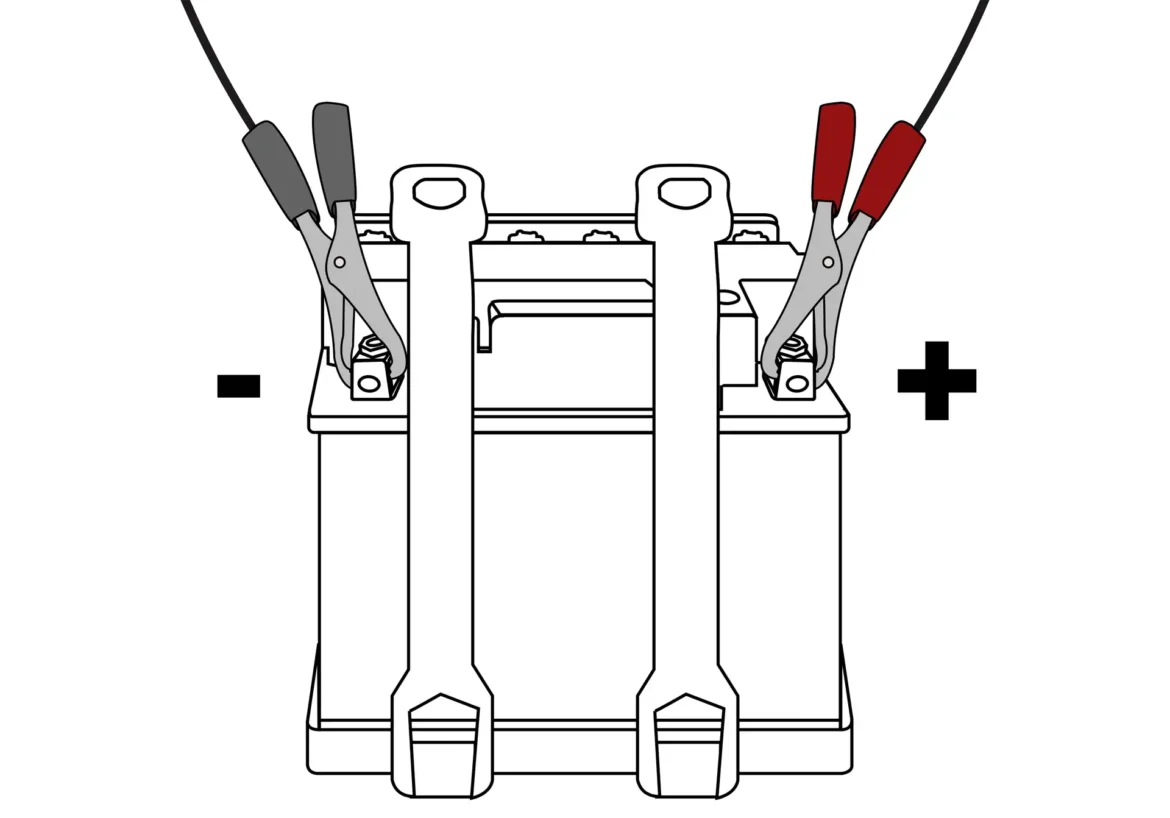
Connect the power cable clamps from the Kawasaki programming cable to battery terminals.
Clamps must be connected correctly or damage may occur.
RED = POSITIVE
BLACK = NEGATIVE (Ground)
Disconnect
WHEN YOU ARE DONE USING YOUR MAPTUNER AND WISH TO DISCONNECT IT FROM THE VEHICLE
Disconnect Maptuner from vehicle.
Reconnect all original ECU and battery connectors.
Replace electrical box cover and test start engine.
