Sea-Doo Spark
Step 1
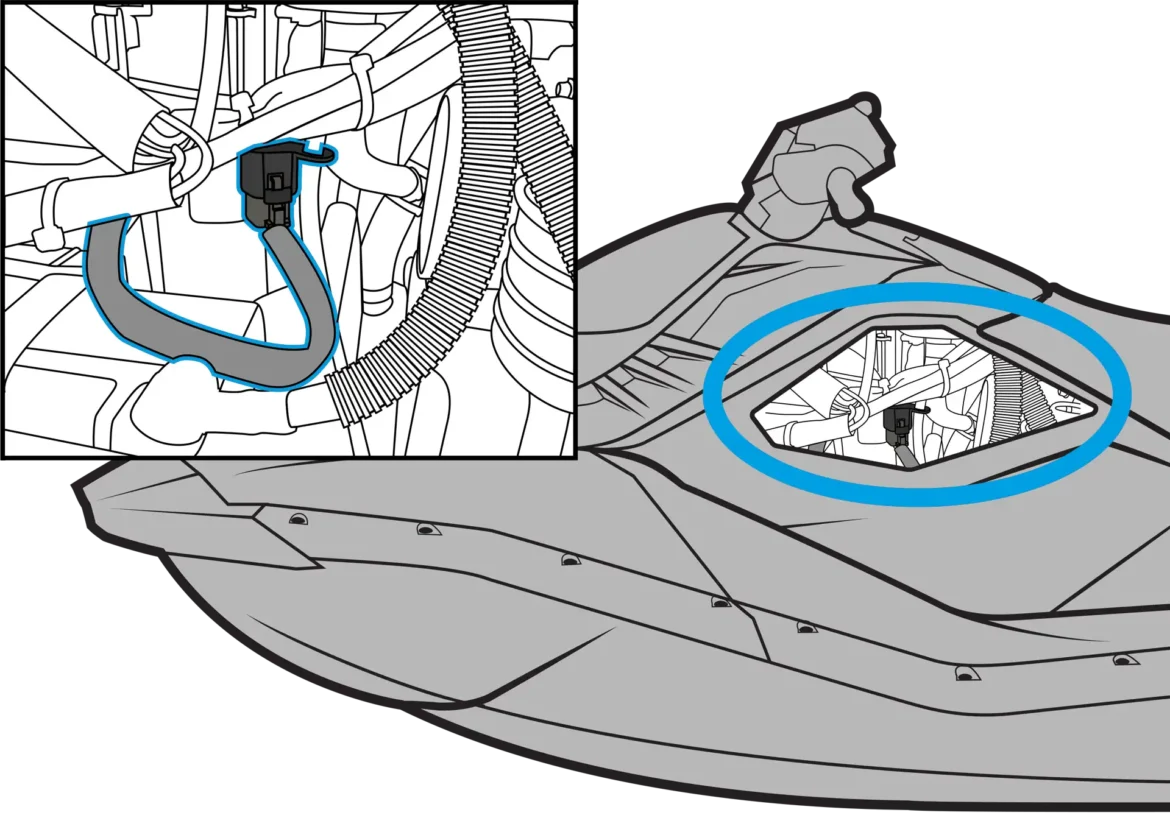
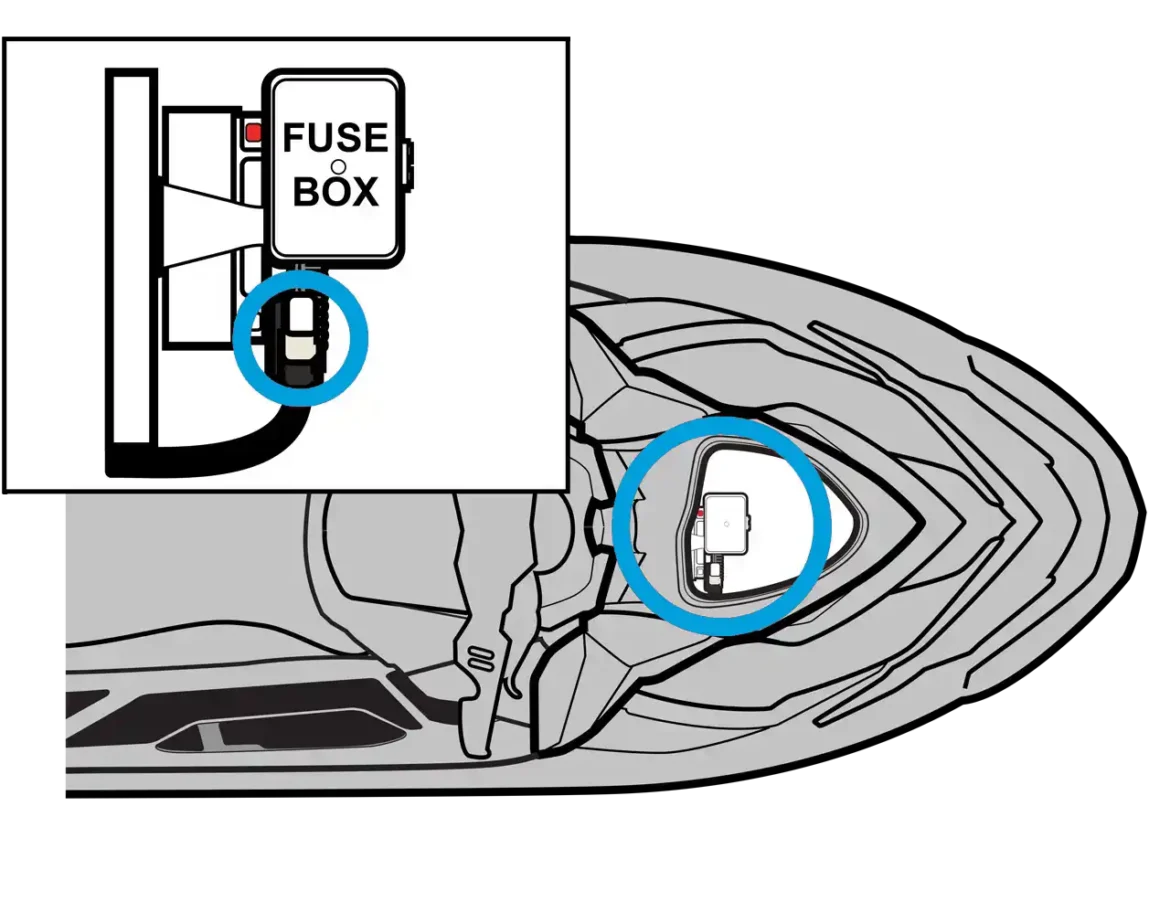
Open the left side panel so that you can access the area shown in this illustration.
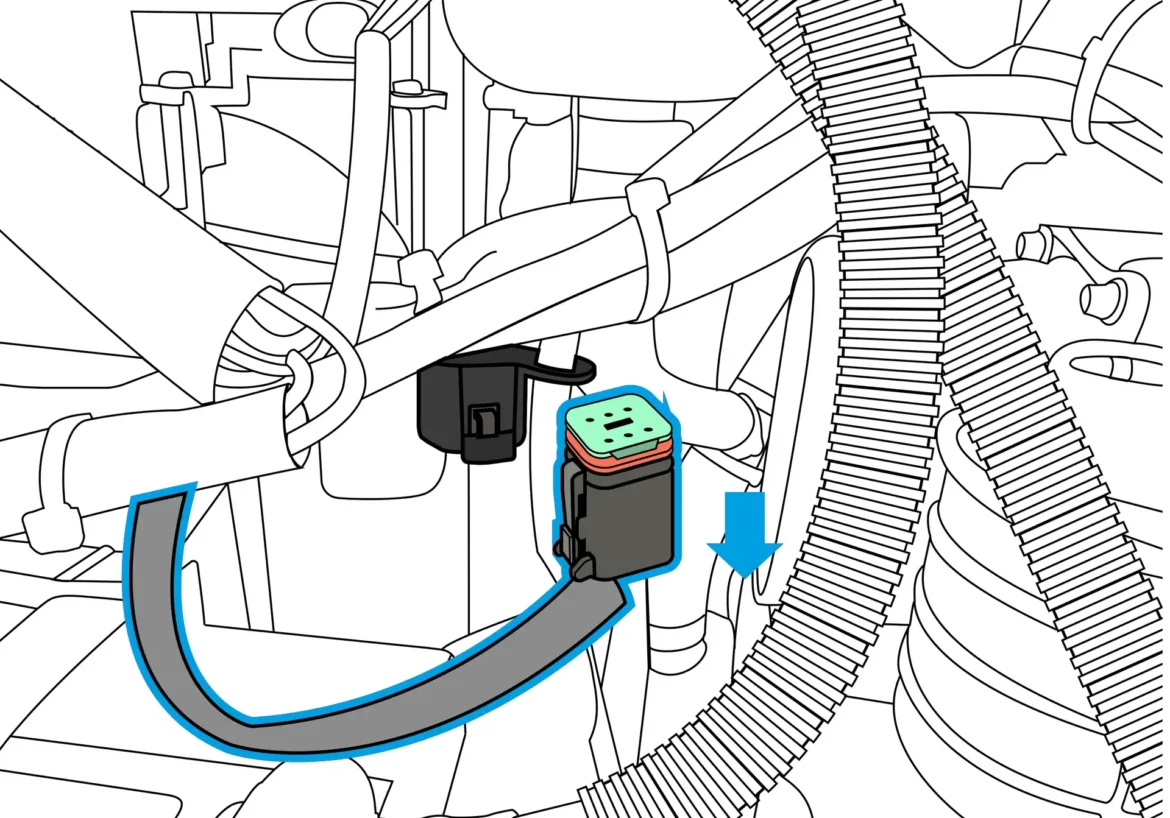
Detach the connector.
Step 2
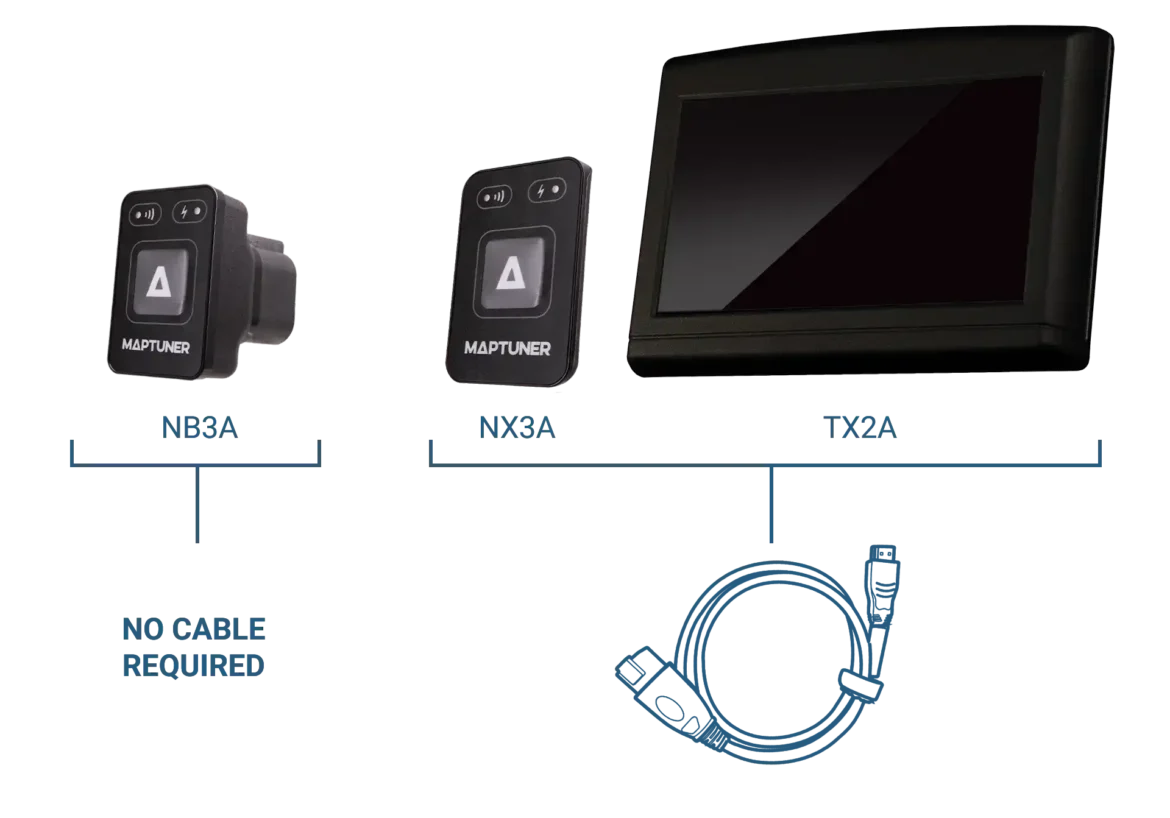
Connect your Maptuner to the connector. This Sea-Doo is compatible with Maptuner X (TX2A), Maptuner Nano (NX3A) and Maptuner Nano (NB3A).
- Maptuner X (TX2A) and Maptuner Nano (NX3A) needs a cable (01-MT013/3)
- Maptuner Nano (NB3A) has an integrated connector for Sea-Doo and doesn’t require a cable
Step 3
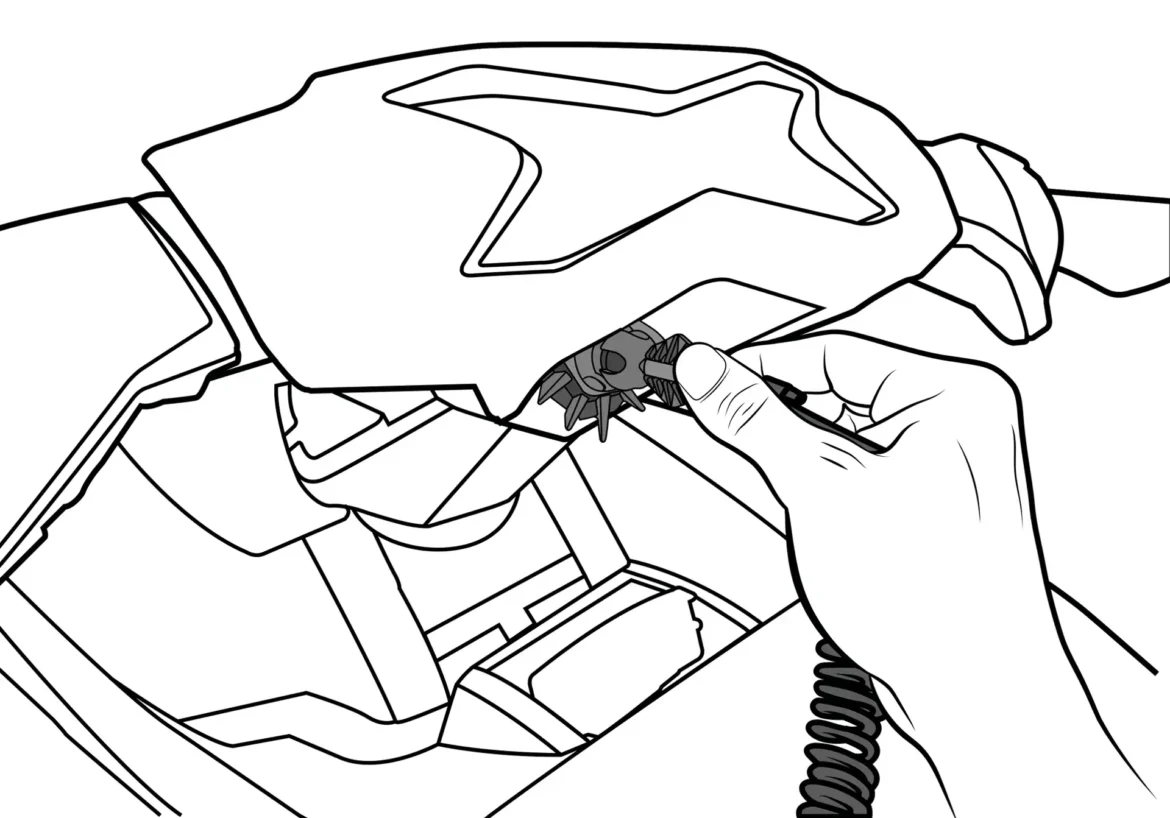
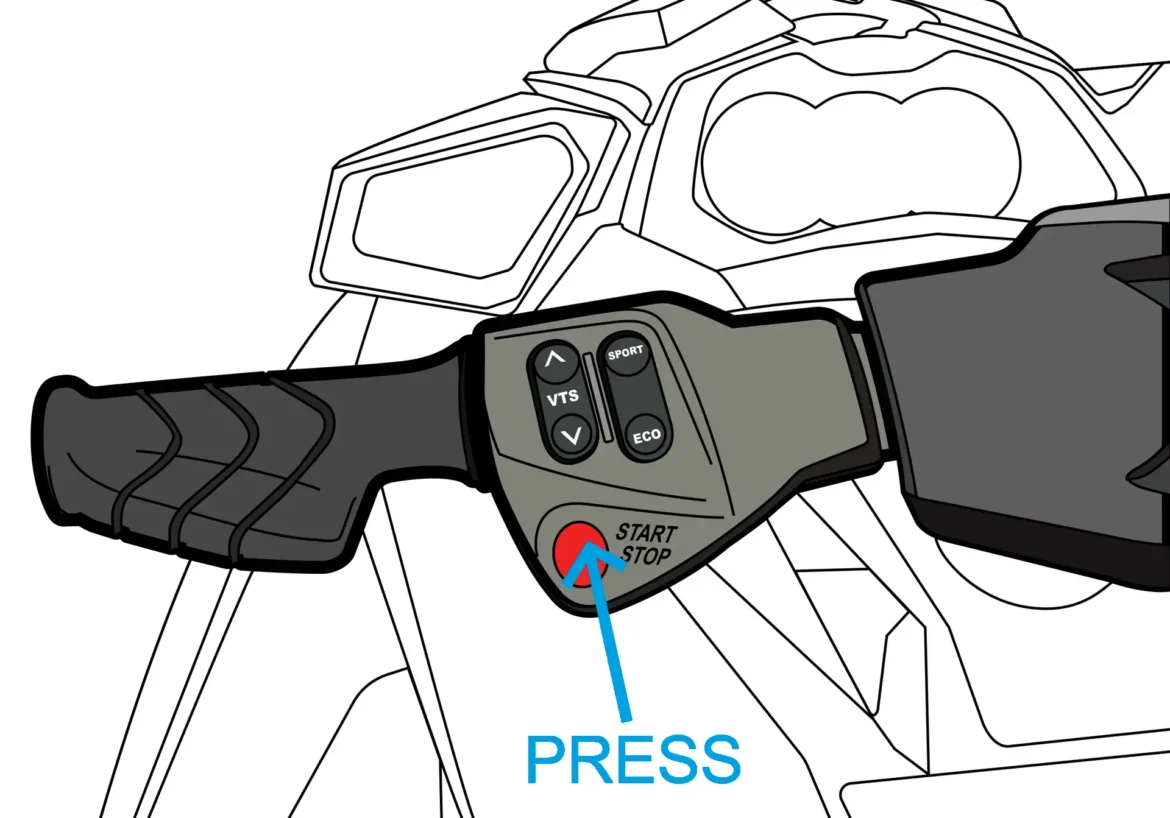
Insert the DESS key/lanyard.
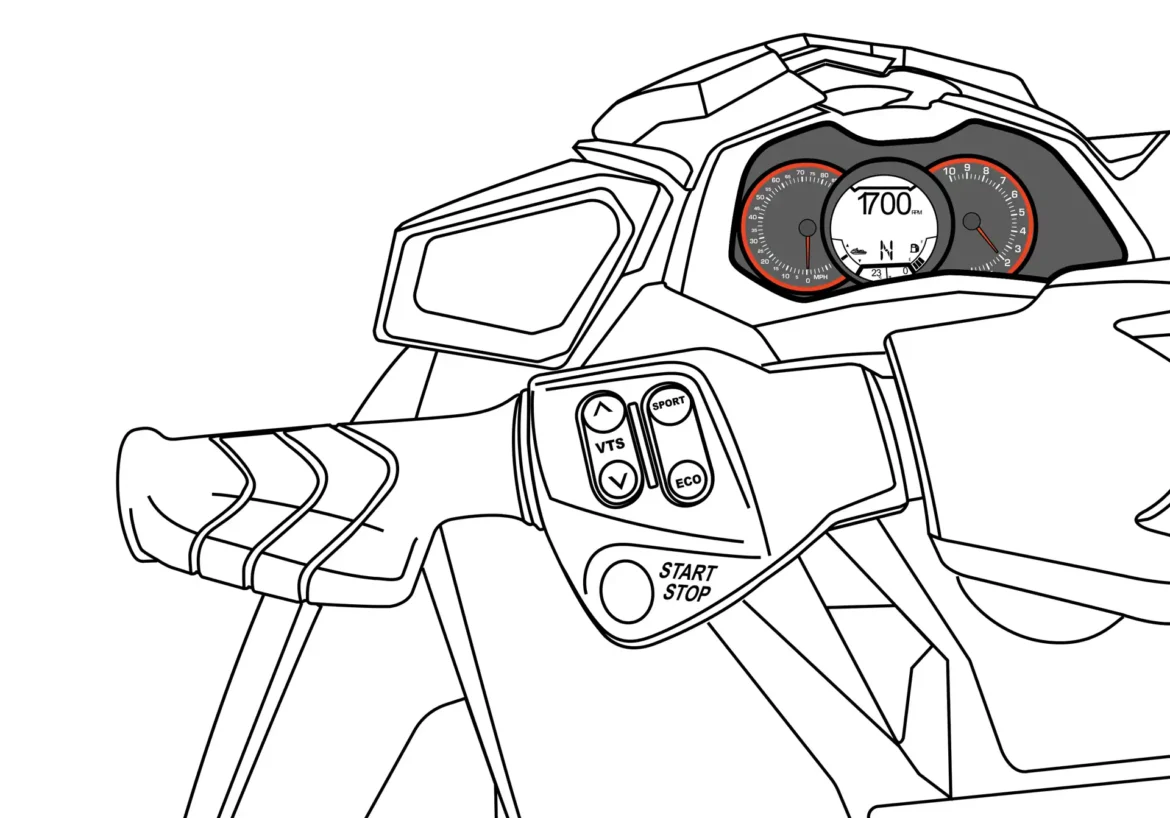
Press RED start/stop button on handlebar switch.
Be sure the gauge cluster is ON.
Sea-Doo RXP 300 / RXT 300
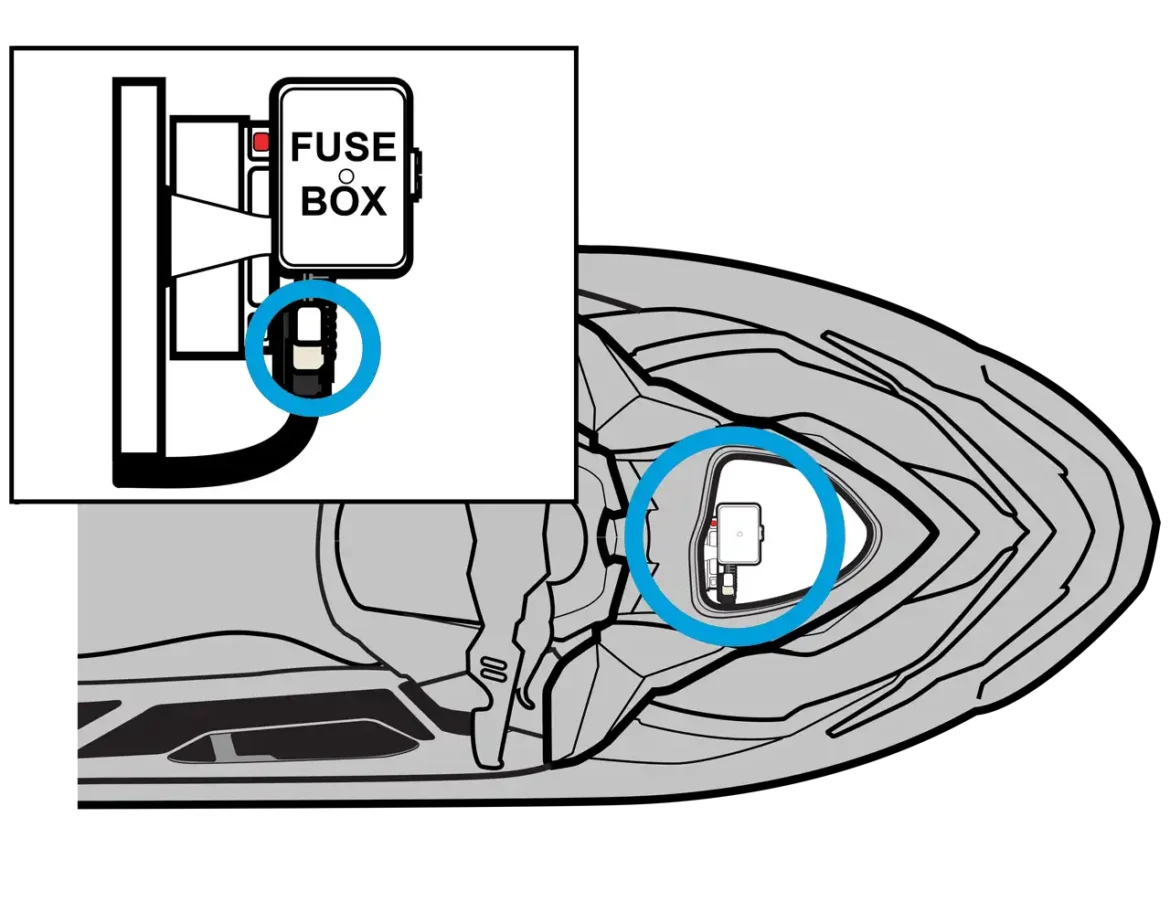
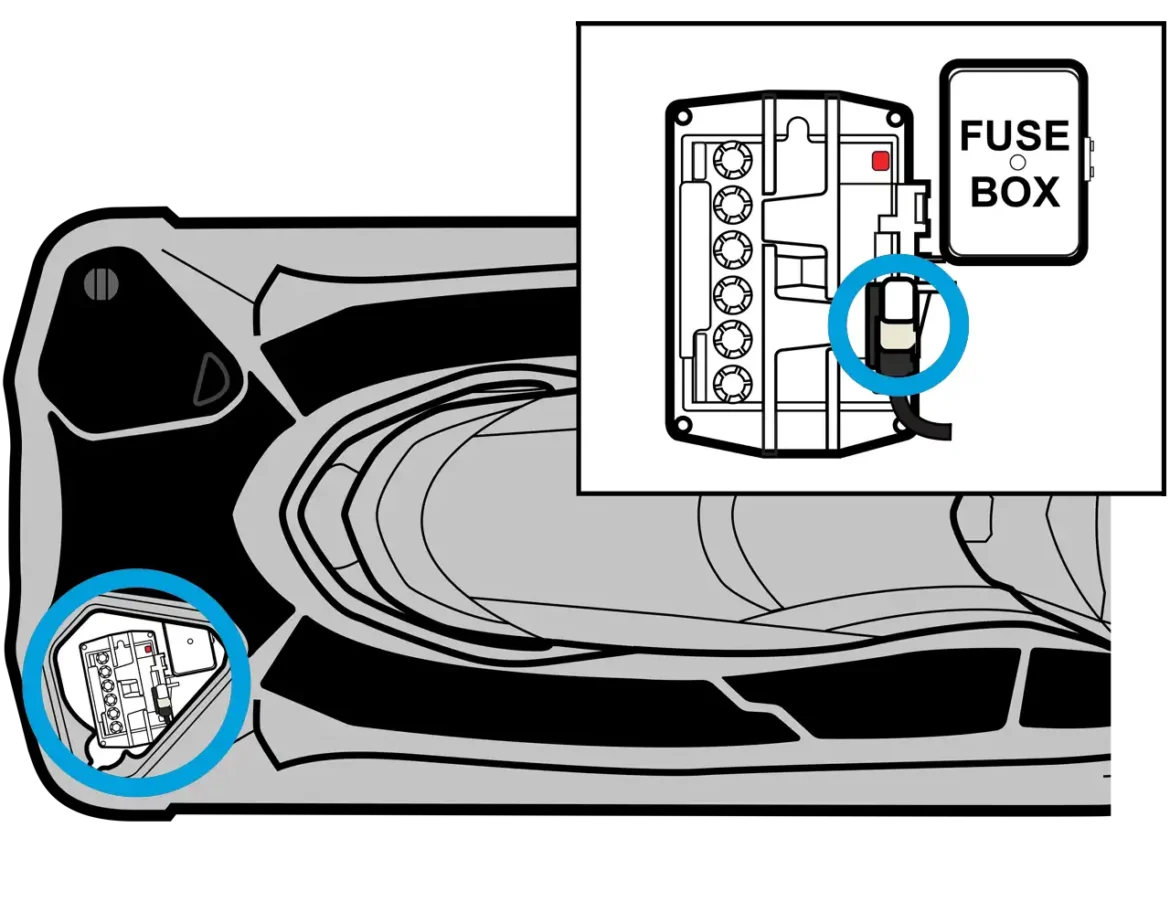
Step 1 – Fuses & OBD Connector Location
Open the front compartment and remove the plastic bulkhead so you can access this area.
Step 2
Connect your Maptuner to the connector. This Sea-Doo is compatible with Maptuner X (TX2A), Maptuner Nano (NX3A) and Maptuner Nano (NB3A).
- Maptuner X (TX2A) and Maptuner Nano (NX3A) needs a cable (01-MT013/3)
- Maptuner Nano (NB3A) has an integrated connector for Sea-Doo and doesn’t require a cable
Step 3
Insert the DESS key/lanyard.
Press RED start/stop button on handlebar switch.
Be sure the gauge cluster is ON.
Clamps must be connected correctly or damage may occur.
RED = POSITIVE
BLACK = NEGATIVE (Ground)
Sea-Doo RXP 260 / RXT 260
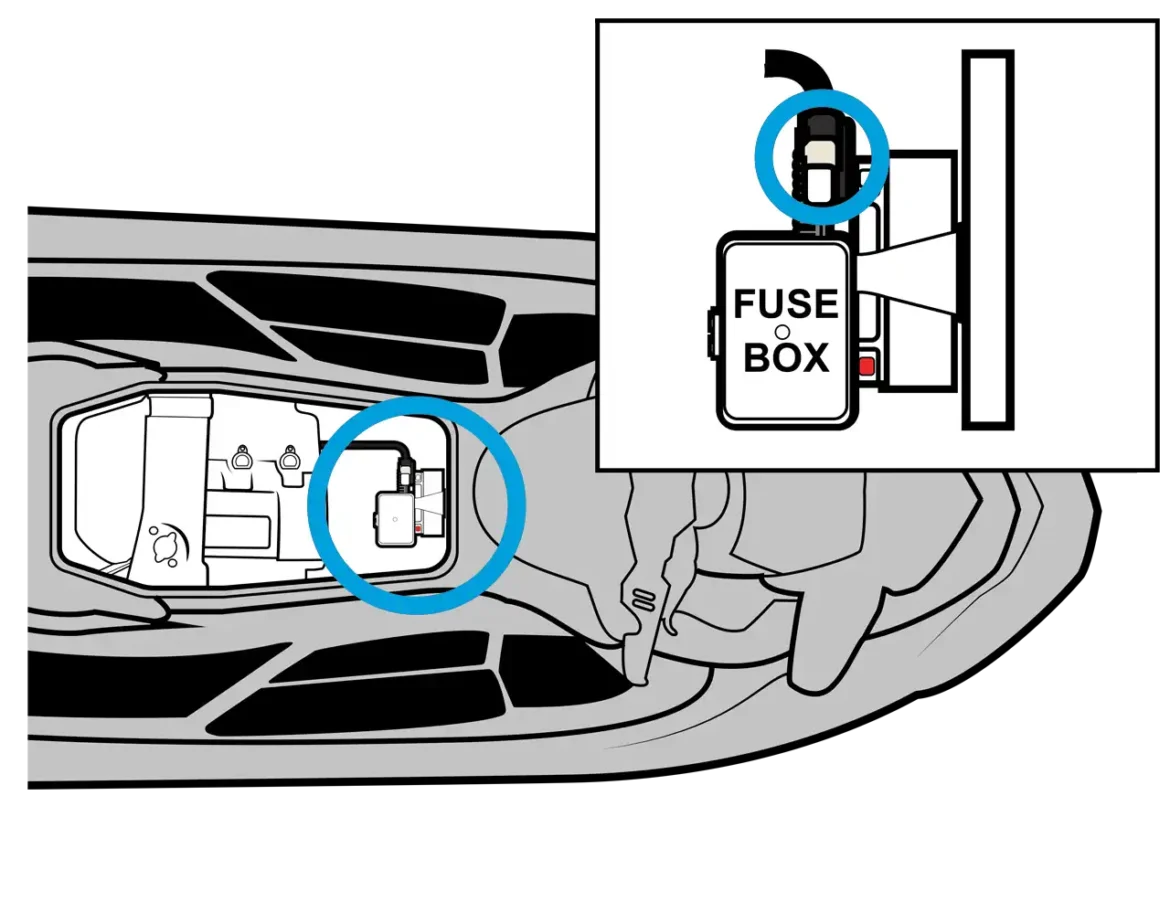
Step 1 – Fuses & OBD Connector Location
Open the front compartment and remove the plastic bulkhead so you can access this area.
Step 2
Connect your Maptuner to the connector. This Sea-Doo is compatible with Maptuner X (TX2A), Maptuner Nano (NX3A) and Maptuner Nano (NB3A).
- Maptuner X (TX2A) and Maptuner Nano (NX3A) needs a cable (01-MT013/3)
- Maptuner Nano (NB3A) has an integrated connector for Sea-Doo and doesn’t require a cable
Step 3
Insert the DESS key/lanyard.
Press RED start/stop button on handlebar switch.
Be sure the gauge cluster is ON.
Clamps must be connected correctly or damage may occur.
RED = POSITIVE
BLACK = NEGATIVE (Ground)
